Ladyfingers Genoise
Season 1 Episode 13 | 24m 6sVideo has Closed Captions
California baking teacher Flo Braker shares a classic technique for creating ladyfingers.
Julia Child observes California's well-know baking teacher Flo Braker as she demonstrates the classic French technique for creating ladyfingers genoise, the batter of which is used as the base for a variety of miniature decorative cakes.
Problems playing video? | Closed Captioning Feedback
Problems playing video? | Closed Captioning Feedback
Ladyfingers Genoise
Season 1 Episode 13 | 24m 6sVideo has Closed Captions
Julia Child observes California's well-know baking teacher Flo Braker as she demonstrates the classic French technique for creating ladyfingers genoise, the batter of which is used as the base for a variety of miniature decorative cakes.
Problems playing video? | Closed Captioning Feedback
How to Watch Baking With Julia
Baking With Julia is available to stream on pbs.org and the free PBS App, available on iPhone, Apple TV, Android TV, Android smartphones, Amazon Fire TV, Amazon Fire Tablet, Roku, Samsung Smart TV, and Vizio.

Visit the Julia Child Experience
Get recipes, read tributes from celebrity chefs, and more. Bon appetit!Providing Support for PBS.org
Learn Moreabout PBS online sponsorshipBoom!
Hello, I'm Julia Child.
Welcome to my house.
What fun we're going to have baking all kinds of incredible cakes, pies and breads right here in my own kitchen.
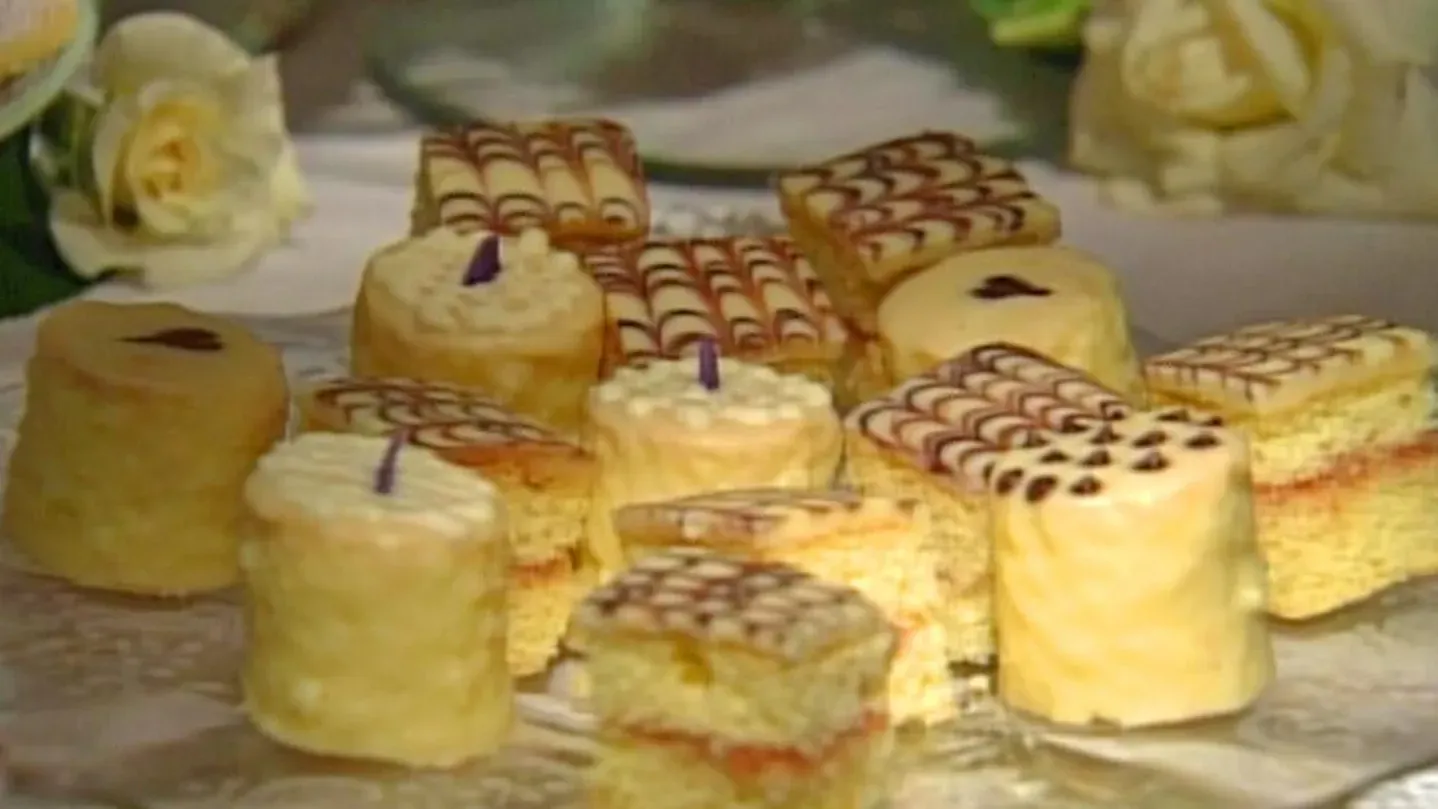
Flo Braker, California's well- known baking teacher and author reaches back to classic French technique for her ladyfinger Génoise which is the basis for creating these delicately delicious, decorative miniature cakes.
Join us, on: [Captioning sponsored by VIEWERS LIKE YOU] This is a Génoise cake.
It's probably one of the most important classics anyone who wants to be a baker should have in their repertoire and if you know how to make this you can make ladyfingers these cute little madeleine cookies and little beauties like these and Flo Braker the baker is going to show us how to do it.
And I'm happy to do that.
Good.
First thing, we're going to take a nine-inch-square pan and we are going to grease it with some solid shortening.
I think it's very important when you're making little squares and little circles from your Génoise you want to make sure that it comes out of the pan.
Then we'll put a little bit of flour in here like this and I shake it around... out, okay, so that's just fine.
Going to dump this right here.
And then what I'm going to do is put the parchment right in here and then we're ready to make our Génoise.
You don't need to butter or flour the parchment?
No, you do not, no, you do not.
Now what I'm going to do is I'm going to be measuring my flour and what I want to do is the recipe calls for 1 1/4 cups of sifted flour and I like to use just a sieve.
I think it's easy to do... Oh, rather than a... ...than a triple-sifter.
So what we're going to do is we're going to take our cup and we're going to measure 1 1/4 cups of sifted cake flour.
Now, if you had a scale, you would be able to weigh that and it would be very fast but this is instead... And how much would it weigh?
That would weigh probably 125 grams.
Mm-hmm.
At this point, that is no longer needed.
Now I put my sifter back and this is my 1 1/4 cups so I'm going to take a tablespoon of sugar an eighth of a teaspoon of salt, like so and then what I'm going to do is, I have my butter already.
This is three tablespoons of butter and that I don't want too hot.
I just want it a little warmer than body temperature.
All right, and then, these are my eggs.
These are going to now have a half a cup of sugar added to it.
These are going to now have a half a cup of sugar added to it.
How many eggs have you got?
This is two eggs and four egg yolks.
And the reason... Do you use large eggs?
I use large eggs.
Graded large-- two whole eggs and four yolks.
And the reason is, is that this cake I'm trying to make a little moister and a little bit more tender.
And now we're going to add a half a cup of sugar to our eggs and a tablespoon of sugar.
And at this point, I want to make sure that I whisk this together so that I do not have any sugar sitting on top of the eggs because it might burn them which would inhibit their really puffing up and, and getting light and airy.
I always say to make note of what it looks like when you turn it on because it's kind of orangy and as you whip this, which will take about five minutes then it gets very light, fluffy and white and it's sort of triple in volume and what I'm looking for is that it sort of look like softly whipped cream.
And this is what you really call "whole-egg meringue."
Now I want to test it and see how the ribbon stage is doing.
Look at it now, it doesn't look "eggy" at all, does it?
At all, it's white and it's fluffy.
It looks like softly whipped cream.
Is it making the ribbon?
It's making a ribbon, and what I like is that it stays on top.
So what I'm going to do now is just add the vanilla and then, while I'm doing this, I'm going to sift my flour.
And now you can see that it is this lovely, sort of beautiful, I think, mixture.
That is staying right up there, that's beautiful.
Stays right there, and this is not at its most fragile point.
And what I'm going to do, you noticed that I add a tablespoon of sugar that I sifted with the flour and that is to sort of separate the particles a little bit more finely because the flour tends to clump, especially cake flour.
Mm-hmm.
And so, I'm folding.
Do that very slowly, and see how you do it.
Okay, I go down and I come up.
Down, and I always bend my wrist.
And I'm in the center and I'm not getting really crazy about getting all the flour in.
I have a lot more folding to do.
And you're not deflating it, too.
Exactly, and so, what I'm going to do is add more flour and I'm going to add about a third at a time of the flour.
I just keep folding and then sometimes I... How do you know that you've folded enough, now?
Oh, good question, because...
I know because I don't see any more flour and when I scrape along the side then that sort of gives me an indication of what's going on, also.
So that is now in and then I'm just going to take the rest of the flour and put it on top.
Now you're going to notice that this is starting to take on a little bit more body because it's got a lot more flour in it.
Do you see, every time I turn this over I don't see any flour?
Yeah.
So I know I've probably done enough.
Now, here is our butter and we don't want it too cold and we don't want it too hot.
If it's too hot, what happens is it's going to start dissolving our wonderful little bubbles.
And we're going to put some into the butter.
Now we're going to put some into the butter.
Now, you see, I am folding about a cup of the batter in.
All right, now I'm going to pour this back and you notice I'm sort of gentle about all this.
I don't really stir it at any one time.
And at this point, this is when the batter is fragile.
This is where it's fragile because that fat will weigh down on the, uh, volume and I'll take the, the cake pan and I'll put it into the cake pan, thank you.
All right, and at this point I just let it sort of fall out and I have to tell you, if, at this point you see any flour that hasn't folded in I just sort of mix it together and I'm just going to ease this in.
Now, the more that I want to manipulate this then the more I'm going to start popping those lovely air bubbles that we have worked so hard to get in.
Now we're going to put this in a 350-degree oven for about 20 to 25 minutes.
And we want to put it in the lower third of the oven and we're going to check it in 20 minutes.
Julia: Now how exactly do you tell that that... Flo: I can see that it springs back.
I don't just go by color because ovens can do different colors, some of them...
There is a little separation.
Exactly.
You say it's done.
I say it's done.
Okay.
Now we're going to let this cool for about five minutes before we invert it out of the pan.
Now what we're going to do is invert the cake out of the pan.
We want to make sure that it is cleaned away from the sides.
It's been out for about five minutes and you just take, um, a little spatula like this and make sure that it is free and just be very gentle.
If it isn't, it'll just tear as it comes out of it.
Absolutely.
And then that makes sure that it'll just come out nice and neat.
And then what I want to do is... put this on top like so and then... Hope for the best.
Right.
This down like that.
There we go.
There.
Perfect.
Then I like to take this parchment and I just take it off like this.
Perfect .
And then I put it back on top sort of the sticky side up, I say and then I put this on top of there and...
Multiple reversals.
It's easier to do than to write.
It's tricky to try to write and make that clear.
Well, that looks, that looks beautiful.
It smells... smells like I'd like to eat it right now.
Now we're going to let it cool and when it's completely cool then we're going to do something very interesting with that.
In the meantime, I want to show you something that I think is wonderful that you can do with the same batter that we just made for that cake.
This is exactly the same batter.
Exactly, and so, what we're going to do is we're going to make ladyfingers and madeleines.
Great.
I'm going to pour all this into this one bag and so, we'll just pour the rest in...
The batter looks beautiful, doesn't it?
And so, we will, at this point, take it...
Okay, now I'm going to make ladyfingers.
You notice that I have three-inch lines here that I marked off and I will pipe like so.
I think piping is a lot of fun.
You just pipe to the end of that line and up.
And lifting it up.
And you can pipe them very close together although these will sort of come together in the oven.
Okay, now, this would make two sheets of ladyfingers but you can also make madeleines with the same batter.
What I like to do is just let it grow.
You notice that I just twisted the bag...
So we could make a double... but we could make a double batch...
Yes, and this would make, if you use one recipe it would make 24 of these.
Good.
All right, now I want to powder-sugar our ladyfingers.
We're just going to tap it.
We get more control when we tap than just shake.
Yeah.
And you can coat them heavily.
Julia: Ready to go in... now, what the oven at?
Oven is at 400 degrees and we're going to bake them about five or six minutes and check them again.
Madeleines may take a little longer.
I think these little madeleines are just charming.
They're becoming very popular now, aren't they?
They are, they are.
These ladyfingers...
I kind of applied a little bit more powdered sugar, like so.
And then what I do is to cut them apart, I use a pizza cutter which I can show you.
Just take this off like this... Oh, that's a good idea.
Now what we're going to do is proceed to our cake using the nine-inch-square Génoise.
Anyhow, I'm just going to slip the cake onto this cardboard round.
I think these are invaluable.
And the reason is it just makes it easier for me to work with.
What I like to do is I like to take a long serrated knife.
I like it to be wider than the cake and I put it right in the middle of the cake and I really have to lean over.
And all I'm doing is just making a short little cut maybe about a half an inch into the cake and you see how it can really rotate easily because it's on the cardboard.
This is the idea, getting it even.
Exactly.
Okay, now, you see I halved this all the way across, a little bit.
Now, that's sort of my guide.
And then, at this point I'm not going to pay any attention to anything except right here.
I'm going to follow what I just did and I'm going to keep turning.
You're just going a little deeper.
Exactly.
All right, so now what we're going to do is take this... another cardboard, and split it and you see the texture?
That's beautiful inside.
That's actually the one that we baked.
Yes.
All right, now what we want to do is soak this.
This is a wine soaking syrup.
We are going to just dab it.
What are the proportions?
It's a quarter cup of sweet wine whatever you like.
Taste it, first, and then what I have suggested is to add a tablespoon of sugar.
You don't have to heat it.
It'll dissolve.
All right, now at this point we are going to take some of our jelly.
This is red currant jelly.
Red currant jelly.
And if you find that it's got a lot of pectin in it I put it through a sieve.
What would the pectin do?
The pectin makes it difficult to really spread.
And the point is that you want a thin layer.
Okay, so we have plenty.
We don't want too much.
And, as I say, don't be bothered by anything that's going on in the sides because that will be taken care of later.
Not having filled it all doesn't matter.
It doesn't, it really doesn't.
You'll see in a moment.
Now we're just going to put this back on top.
All right, now I think we will put this on a cooling rack and put the cooling rack on a jelly roll pan.
Now, what I'm going to do is glaze it with a white chocolate ganache.
and I'm using 12½ ounces of white chocolate.
I chopped it up pretty finely so it will melt easily.
Oh, you've got hot, heavy cream.
I have hot, heavy cream.
and I'm going to pour a half a cup to begin with into my container.
and I'm going to pour this over the white chocolate.
That's hot enough so it's going to melt.
It's going to melt.
There's going to be an exchange of temperatures.
Now, when I buy white chocolate what I'm looking for is... on the label It should say that it has cocoa butter in it.
And I also am concerned that it is creamy-colored ivory-colored, and not white.
Just like that.
Now, I am going to pour in another tablespoon of heavy cream like so... and then I'm going to stir that.
Now, I'm not whisking.
You see, I want this to dissolve the chocolate and I'm not whisking because I don't want a lot of air bubbles because it's going to be a glaze.
And then, at this point I'm going to take a sieve and I'm going to pour it through You're just going to sieve it.
Yes, because most of this chocolate is soft and this will sort of emulsify it.
All white chocolates can be different.
So I want to just see how much cream it takes.
I'm going to take a piece of bread and see how this glazes.
I was wondering why you had this piece of bread there.
Well, I think it's a wonderful way to test if it's the right viscosity.
And, see, I'm just going to take a little bit and see if I think that this could use a little bit more cream.
And this is what everybody can do.
See, it's working out very nicely.
That makes a nice little snack.
( laughing ): Exactly... and it doesn't seem to be floating down to the bottom.
And so what I will do is just add a little bit... just a little bit more cream, which is like two teaspoons stir that in, and you see how you kind of do this and you can tell what it's like.
All right, now you pour this on top just like that... and then, at this point we're just going to spread this on.
You wait and see, this will make the pastry chef out of everybody.
Now, we have some pastry cones some paper cones that have been handmade.
And we're going to fill one with semisweet chocolate and one with milk chocolate and we're going to pipe it.
And I want to test that, see how it pipes.
It's working fine.
So we're going to see that it's fluid and just make strings across.
And you'll see that whatever you do there's no such thing as a mistake.
What's nice about the paper cones: anyone can make them.
We have illustrated directions in the book that accompanies this television series.
Because everyone has to know how to make them.
Yes, and what's so wonderful is that they're for just small amounts and then you discard them.
Then we take semisweet chocolate all right, again, just piping.
Don't worry about any kind of unconnected lines But, you know, this is what happens.
And then, at this point I take this pick and I'm just going to do... Oh, yes, that's nice, isn't it?
And if you notice...
I guess you could do it with a knife.
You could, or with toothpicks.
Now, you notice I go all in one direction.
I don't go down and up and now I think this sort of looks like Florentine.
It looks very professional.
Well, of course, you are a pro.
Oh, well, thank you.
Then we're going to set this aside.
We're going to let it set up, which will take about an hour.
But if you wish to speed it along you can put it in the refrigerator.
And then I will show you how we will trim this and cut it into little pieces of petits fours.
Well, while the cake is setting up for the Florentine squares let me show you something else that we can do with the nine-inch- square Génoise.
This one has been soaked with the same wine syrup but, instead, I'm using an apricot jam that has been sieved and spread just like we did the currant jelly.
These, we're going to cut out little circles, and it will expose the outside.
And I just press down, sort of twirling and this is a 1½-inch cutter.
And then, just put it on, like so.
That's a little petit four.
Okay, now, what we want to do is our white chocolate glaze.
This is our ganache... That's the same stuff.
...nice and creamy.
You can chill this cake before you cut out the little circles.
It will sometimes give you less crumbs on the side when you start pressing them out.
And also, whatever goes off the cake is no problem.
It's re-usable for the next time.
That's great.
Okay, now... these are glazed.
This is when the fun begins.
I will show you, here is our piped...
This must be our milk chocolate and then I like to do something like that.
And then I take a tooth-pick.
I go in front of that little circle and just like so, and that's like a little heart.
Oh, that's a little heart.
And then you can also do little squiggles back and forth, like this.
You can do whatever you wish.
I take a little bit of a lilac, candied lilac and I just put that on the top sort of stand it up.
Right now, you can't pick these up.
What we'll do is put them in the refrigerator and we can let them get harder.
And they will be easy to pick up or you can let them sit out.
The other thing that's very important is you take a spatula and you just rotate this a little bit because you're cutting off any of the glaze from underneath.
Oh, I see.
And then it's easy to pick them up and they won't stick to this.
Now, what we're going to do is cut our Florentine squares and here it is.
And this hasn't totally set up.
But we want to show you how you can make these nifty little guys.
I love that.
All right, what I do is now, I cut away the sides.
Of course, those you can eat.
Oh, absolutely.
These are nice sweet hors-d'oeuvres.
Okay, and then we can cut away this side but you cut as close to the corner as you can because you don't want to waste too much.
That's why I was being so careful to get the cake to come out of the pan.
And you cut all along the sides.
Here we go... Now, at this point, I have a ruler so what I do is, I take this.
I just do 1½ like so, all the way down.
But I'm just going to do a few, right now.
And I'll make notches here.
1½, on all four sides.
All right, now, at this point... Now, this hasn't set up completely.
But we'll just pretend it has.
And what I do is I cut through just the glaze.
This is what keeps it from cracking... on you when you cut it because you don't want to just take a knife and just start plunging in.
You've learned all this from bitter experience.
Exactly, absolutely.
That's the only reason I can stand here and speak like this.
Right, and the next one you line up and do the same thing always cleaning your knife.
You can't rush through these things.
No, you can't.
Now, you've cut through your cake.
And again, if you wish, you could chill this cake and it would probably have less crumbs.
It's very fresh.
And then you cut all the way down.
And then this, you could leave just like this early in the day.
It will not get stale because they're all together.
And then, when it's time to put them on your little plate then you have them and you can put them on your plate.
Aren't those cute?
Look at these lovely things these madeleines and lady fingers... these darling little minicakes.
Flo, it's been wonderful to have you.
You've taught us how so here's to Flo Braker, baker.
Thank you, and here's to you.
( clink glasses ) Julia: Bon appétit!


Support for PBS provided by: