The Ultimate Bookcase, Part 2
Season 16 Episode 1609 | 26m 44sVideo has Closed Captions
The team dives into the glass-paned doors and drawers that feature exposed joinery.
In the second of this two-part series, the team dives into the glass-paned doors and drawers that featured exposed joinery. The result is a storage piece with style.
Problems playing video? | Closed Captioning Feedback
Problems playing video? | Closed Captioning Feedback
Woodsmith Shop is a local public television program presented by Iowa PBS
The Ultimate Bookcase, Part 2
Season 16 Episode 1609 | 26m 44sVideo has Closed Captions
In the second of this two-part series, the team dives into the glass-paned doors and drawers that featured exposed joinery. The result is a storage piece with style.
Problems playing video? | Closed Captioning Feedback
How to Watch Woodsmith Shop
Woodsmith Shop is available to stream on pbs.org and the free PBS App, available on iPhone, Apple TV, Android TV, Android smartphones, Amazon Fire TV, Amazon Fire Tablet, Roku, Samsung Smart TV, and Vizio.
Providing Support for PBS.org
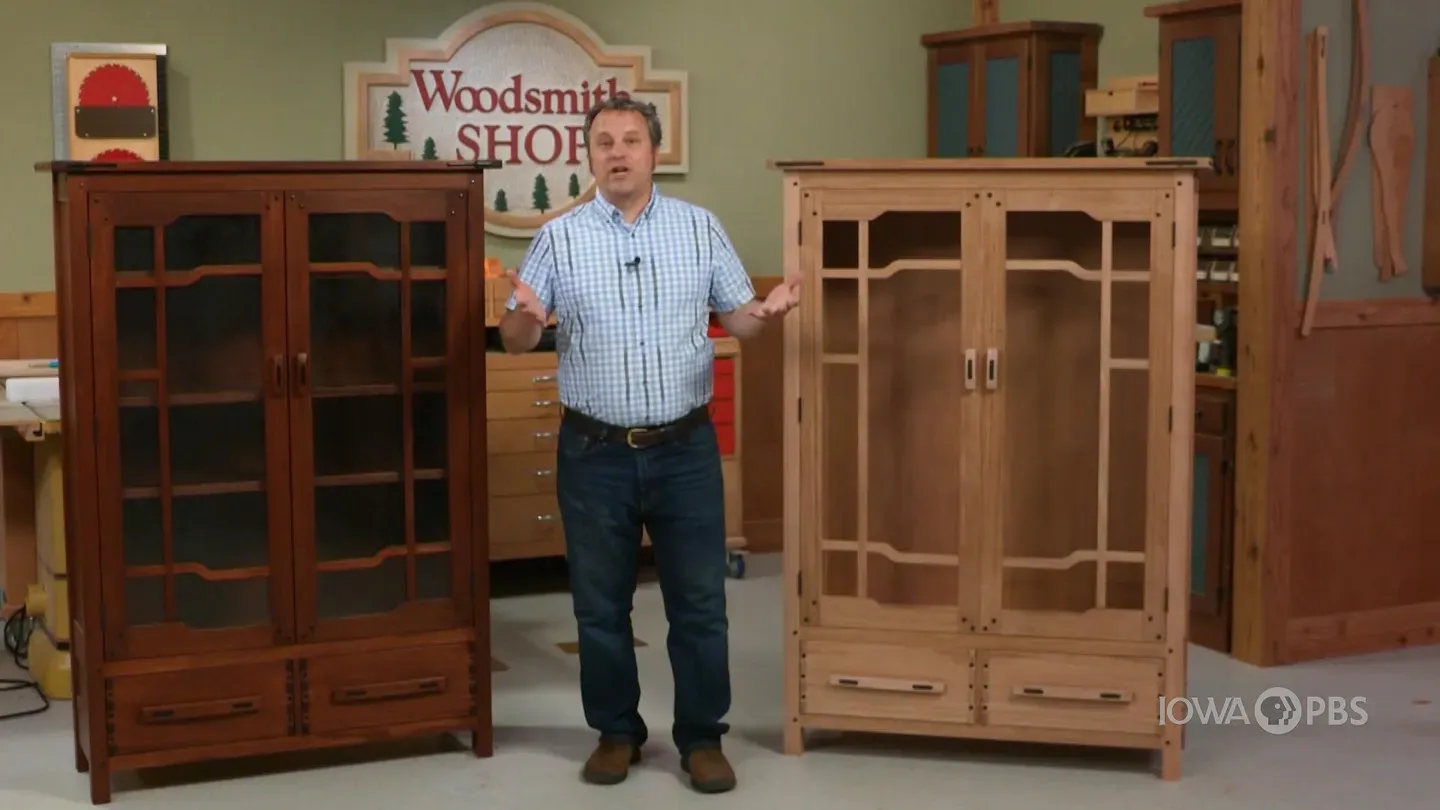
Learn Moreabout PBS online sponsorship♪♪ It's time for another episode of "The Woodsmith Shop."
You caught us right in the middle of a project here.
We're working on this Greene and Greene style bookcase.
And in the first episode, Logan and Chris tackled the main part of the case, building a frame and panel assembly for the sides and working on the details that will allow it to house both drawers and doors.
Chris followed up with some really cool Greene and Greene style details, like the decorative splines and the plugs that show off the joinery in a really cool way.
On today's episode, we're going to tackle those inner parts -- the doors and the two drawers.
There's a lot going on here and there's a lot of woodworking to get started on, so it's time to start building.
Announcer: Major funding for "The Woodsmith Shop" has been provided by... Old Masters -- offering wood stains and finishes for the woodworking enthusiast and professional.
And by... Kreg -- From the first cut to the final assembly, providing woodworkers with products that help to simplify woodworking challenges.
Kreg.
Additional funding provided by... Titebond Wood Glues -- the pro's advantage.
And by... ♪♪ ♪♪ ♪♪ ♪♪ ♪♪ One of the things that's interesting about a project like this Greene and Greene bookcase that we've been working on -- how it seems like there's several many projects within it.
Now, Logan and Chris did a great job on assembling the main case.
Project number one.
Now we move on to a second project, and that's to build the two doors.
There's a lot of parts that are going on here, which is why I kind of view it as its own project.
To add another wrinkle to it, not only are you building something, but it has to fill a specific space.
So we have the opening in the case that these two doors need to fit.
But let's look at the doors on our finished version to see what's going on here.
Now, the doors themselves are joined with mortise and tenon joinery that echoes the case construction that we did already.
One thing that steps it apart, though, is this cloud-lift detail that you'll find on a lot of Greene and Greene pieces.
And what it looks like is the way that clouds are often portrayed in drawings and paintings where you have one level of the cloud stepping up to other levels.
We see that not only on the top and bottom rails, but also on the intermediate pieces as well.
It throws a few extra curves, figuratively and literally into the construction process.
But what it does is add a nice visual touch to what can often be pretty rectilinear.
Lots of straight lines and sharp corners.
The other thing that you'll notice is that there's a glass panel on the doors here.
Otherwise, what's the point?
And here we used a pebbled glass.
So there's small little air pockets within the glass that give it kind of a vintage or retro look to it.
There are also intermediate stiles and rails in here that help divide the doors visually, but still just a single piece of glass here.
I'm going to get started by cutting the stiles and rails and taking care of the joinery.
Now, in doing so, even though I want to end up with an even gap all around the doors, I'm starting by cutting the stiles to be pretty tight within the opening.
And then for the rails, I want those long enough to be able to create two doors that I almost just can't fit inside the case.
Don't forget to account for the tenons that we need on each end of those rails.
So for now, I'm going to do a little bit of layout work and head to the drill press and get started on the joinery.
For the door joinery, I'm starting with the mortises in the stiles and I'm going to do those here at the drill press.
It's just one of several ways to create mortises.
Now, with everything all programmed into the machine, It's just a matter of me drilling out the waste on all of these mortises, and I'm going to do that in a series of passes.
For this first one, I'm going to drill a line of holes that almost but not quite connects with each other as I go down.
For my second pass, I'm going to put the center point to the bit right on the in-between spaces here and drill out another set of holes.
All right.
After the second pass, you can see the beginnings of what the mortise is going to look like.
Now, a lot of people stop here, head over to the bench, grab a chisel and start cleaning up those sides.
But there's a lot more that a Forstner bit can do here.
I'm going to take a third, maybe even a fourth pass and take away just those little nibs now in between.
What I'm aiming for at the end is a really smooth-sided mortise that doesn't require any more chisel work.
The glass pane in the door rests in a pocket on the back side, and we'll do that with a rabbet cut on the individual pieces.
Now, the plans show routing it after the door is assembled, but I like being able to manage the parts a little easier here at the router table.
So here's how I set this up.
I have a straight bit installed in the router table set to the correct depth.
Then as a guide, I marked the starting point and the ending point for the rabbet on the stiles here, and I use that as a setup gauge so that I could align the starting point with the front edge of the bit.
And then I made a mark on the fence of the router table to show where the end of the stile needs to be at the beginning of the cut.
A similar mark on the opposite side of the bit will show where the stile needs to be when the rabbet is complete.
So I'll rout that on the four stiles, and we can use that as an indicator for marking and cutting the rabbet on the rails.
Before getting started on the rails, there's one other joinery detail I want to take care of here on the stiles, and that's to cut notches on the inside edge that are going to hold those cross pieces, the muntins, that will divide up the inside of the doorframe.
Now, there's three on each of the stiles.
Now, the thing here is that because those muntins are going to curve a little bit, they're not going to be in the same location from the outside to the inside stile.
So just keep a note of that.
Making them is pretty simple and it involves some handwork, which is pretty fun here at the bench.
What I'm going to do is set my chisel right on that layout line.
Give it a couple of firm blows.
Do the same thing on the other side.
Now with the chisel held bevel down, I can make some sweeping cuts down towards those end marks.
And as I get down towards the end, just go back.
Clean that up down there.
I'll just work my way back.
Till I'm almost at the layout line there.
On the other side, these short little pieces just pop right out.
Again, continue that end line.
To clean things up, I'm going to make a paring cut right across the edge, even with that rabbet.
And then from the top down.
Right.
Even with my layout line.
There we go.
It looks great.
Doesn't take a lot of time.
Now we can move on to the rails.
And although the rails are going to get shaped with that cloud lift profile, we're going to start our process with them rectangular.
It's going to make it a lot easier to cut the joinery.
And the first stage is to cut the wide tenon cheeks here at the table saw.
I've set up a dado blade and used the rip fence as an end stop and I'll make a pass across both faces and on each end in order to form the tenons.
To wrap up the work on the tenons, what we need to do is cut the end shoulders.
Now, I left the dado blade at a quarter of an inch and trimmed off one edge of each of the tenons.
Now, as these get cut to shape, one of those is going to get cut away.
So it's not too big of a deal here.
On the opposite side, the mortise is inset from the end of the stiles a half inch.
So I've raised the dado blade to that half inch and we'll trim up the other tenon's shoulder.
Next up on our to-do list for the rails is to put a rabbet on the back face that's going to correspond with the rabbet on the stiles.
It'll hold the glass panel.
So what I've done here is to use a template and trace the final profile of the rail onto the upper surface.
That's going to give me a gauge for how wide this rabbet needs to be.
Now, I still have the straight bit installed in the router table that I used on the stiles, so I'm going to use that here as I rout the rabbet.
Now, on the wide portion, this rabbet's going to be pretty wide.
And by the time I cut some of the waste away, it's going to be much narrower on the opposite end.
So I need to make this rabbet in a few passes.
I have some push pads here that will give me consistent pressure.
So it's just a matter of making a pass, backing up the fence and making other passes until I get the final width that I'm looking for.
Now, some folk prefer the table saw for making rabbets, but as you can see, the router table and that straight bit did a fine job of creating a really smooth rabbet on the back face.
Here on the front face, I'm going to use those traced pencil lines that I used with the template to remove most of this waste at the band saw.
So I'm going to stay just to the outside of those lines here as I cut that waste away.
And we're going to bounce back over to the router table and use some double-sided tape and reattach the template to my work piece here.
And this time with a flush trim bit, the bearing on the bit's going to follow along that template, removing the remaining waste and giving me a nice smooth edge.
Before we can assemble our doorframes here, we need to address a detail on the tenon.
As we cut it on the table saw, we have square-shouldered tenons, but round-ended mortises.
Now, I'm going to leave the mortises round because I just don't like squaring them up.
It's a lot easier instead to round over the edges of the tenon.
What I need to do is trim away the inside shoulder on the narrow end of our rails.
And I just laid out a line and cut it with a handsaw.
It's pretty quick and easy and saves a lot of hassle of going to a different tool.
From there, I can just grab a rasp.
And I can quickly round off and knock off the corners of the tenon.
I'm not really looking for a piston fit here.
In fact, you can see what I'm going for on this one that I've done already.
Just kind of ease the edges.
It's not super precise.
Once the glue goes on and this gets clamped up, nobody's going to know about it.
But in the end, I just want the tenon to slip into the mortise without hanging up.
So once I have this all taken care of, it's time to grab the glue and the clamps.
♪♪ ♪♪ The four-part muntin assembly that goes into these doorframes are really what set it apart.
Now, the four pieces consist of a long, vertical muntin that will fit into the notches in the top and bottom rails.
They have rabbets formed on the ends that will fit into those notches that I cut earlier.
And then there's also a series of dados that will accept the other muntins that will intersect with them.
And that starts with the simplest of them is just this short little guy that has a short rabbet on one side and a longer half-lap rabbet on the other to just snap into place.
At the top and bottom of the door are these curved muntins, and they seem a little bit complicated, but making them is a lot easier than you think.
We're going to start with an extra-wide piece and from there you can cut the rabbets so that they'll fit into the notches.
While it was still square, I cut a dado across it so that it can overlap the vertical piece here.
Then you can head over to the band saw and set up the rip fence to cut the long straight sections here.
Then slide the fence out of the way to cut the curved section.
With a little bit of sanding and file work, you'll get a nice, smooth, flowing profile that you can see matches that of the rails on the top and bottom edges of the door.
So at this point, what I can do is start to glue everything together.
It's just a matter of pressing those pieces into place and slipping a clamp over them to hold them there.
Once the glue is dry on the assembled muntins like I have here, we can just glue them into the frame the exact same way.
Wrapping up the work on the doors here, what I needed to do is to install the matching ebony plugs in the corners of the door.
Use the same technique that Chris did earlier for the case.
Then, to install the doors, we're using regular butt hinges that are installed in mortises in both the case and the door.
Went with my favorite technique here with a router to remove most of the waste and then came back with a chisel and a mallet to clean up the ends and the edges so I have a nice, square recess.
So now while I do some finishing touches here on getting the fit of the doors just right, I can turn this over to Chris so he can get started on the two drawers down below.
The Greene and Greene bookcase has a lot of projects within the project.
There's the case, the doors, all those ebony plugs and now the drawers.
Now, the drawers are fun.
The back half is pretty typical.
Well, we've got tongue and groove joints to hold the sides and the back.
And we have some plows to make for the 1/4-inch mahogany bottoms.
But the fun starts in the front.
There's large, heavy finger joints, and we're going to use this jig to make them.
And those ebony plugs, yeah, they're there again.
So let's go to the router table and get started.
Our first task at the router table is going to be to cut the groove in each of the sides for the tongue and groove joinery, the bun in the side and the back of each drawer.
I have set up a straight 1/4-inch bit in my router table 3/8 from the fence, 1/4 inch up.
I also have a little piece of scrap here and I'm going to back up each part as I send it through the bit to make sure that I don't get any blowout.
Well, now it's time to go ahead and cut the plows for the bottom of our draw.
Now, on the drawer backs, I can just sail right on through the router table, but for the sides and the front, I need to use a stopped cut.
The reason for that is we have those big finger joints up in the corners and I don't want the plow to break through any of those finger joints and be visible.
So what I've done is I've put some marks on my router table which indicate a point 3/8 before and after the router bit.
For the sides, I need to go ahead and choose to make right- and left-handed sides.
So I'll start from one end.
And then I'm going to stop when I hit my mark and lift the part off.
For my opposite side, I'll end up dropping my side down on the router by plunging and go all the way through.
When I get to the drawer fronts, you'll see me plunge one end, move and stop before the bit breaks out the other and lift up.
So we're going to be 3/8 inch in from either side of our drawer front and 3/8 inch in from the front edge of each of our sides.
So we got to think a little bit here and pay attention.
Now for the fun part.
And that's going to be making the finger joints on the front.
To do that, I'm going to use this neat shop-built jig, which we've shown before on the program.
Now, of course, there's a lot of different ways to make finger joints.
You take your choice.
But this is a cool jig, and I'm going to use it.
I have a front clamped in place and I'm going to go ahead and cut my two fronts using this side of the jig.
And then I'll flip the jig around and do the opposite and use the opposite side of it to cut all of my sides.
In my router, I have a dado cleanout bit, and it has a top-mounted bearing.
So it's going to register against these keys and we're going to get some very, pretty-looking finger joints.
Well, I got my fingers cut on the fronts, and now it's time to turn our attention to the sides.
To do that, I flipped my jig around, which, of course, will reverse the spacing of the pins.
I've also set my router a little bit deeper because what we want is for the fingers of the sides to project forward a little bit beyond the face of the drawer.
And that'll give the drawer a nice tactile quality and help us set off those ebony keys.
So with that, I'm going to go ahead and start routing sides.
♪♪ ♪♪ ♪♪ ♪♪ The drawers are out of the clamp.
So there's two more things that I need to do before I can install the drawers in the case.
First thing is I need to add some of those decorative ebony plugs between each of the fingers of the drawer.
So same routine that we've done before.
I'm going to drill a hole.
I'm going to use a 3/8 mortising machine chisel to cut a square recess, clean it out a little bit, tap those plugs in place.
Well, with the ebony plugs in place on the front of our drawers, it's time to change gears and move to cutting the recesses on which the drawer slides will register.
To do that, I'm going to go ahead and clamp my drawer upright.
To cut the slot, I'm going to use this Masonite template.
And in my router, I've got a hinge template cleanout bit.
So it's a top-bearing bit, but just a very short one and that's all we need.
So I'm going to go ahead and clamp my template, registering to the bottom edge and the front edge.
With everything in place, time to rout.
Well, with the drawers finished, it's time to think about the slides that the drawers will ride on.
As you can see here, there's a maple slide and it's simply screwed to the interior of the cabinet.
The sidewalls of our cabinet and this interior partition are both 3/4 inch thick.
So there's plenty of material for us to screw into.
To make sure I set each of these slides accurately, I used a setting block and simply placed the slide on top of the block and screwed it in place.
Easy.
Accurate.
Well, to finish up the drawers and the doors, I made pulls that match the rest of our case.
They're really pretty easy to do.
These pulls and the ones in the doors all started out as an inch-by-inch piece of mahogany.
I then took it to the router table and, using a coving bit, eased this lower edge to give it a nice pull that you can get your fingers around.
From there we went to the band saw and put a gentle arc over the face of each of the pulls.
And finally more work with ebony.
Smooth it all out.
Attach it with some screws and we've got wonderful hardware we didn't buy from a catalog.
We made it ourselves.
It looks great.
I've noticed that woodworking skills are a lot like watching my children grow up.
You don't see the change day by day, but after building a project like this Greene and Greene style bookcase, you can look back and really see how your skills have taken off.
And when you study the plans and work through the process, step by step, you can find out that, yeah, you really can build projects just like this.
If you're ready to get started, the plans are at our website, WoodsmithShop.com.
You'll also find other videos, including one on how to finish a piece like this, as well as other project plans, inspirational videos, tool techniques and more.
And then we'll meet right back here for another project in the Woodsmith Shop.
♪♪ ♪♪ ♪♪ If you'd like to get more video tips and techniques, sign up for the free weekly Woodsmith eTip.
Every week you'll receive an e-mail with a video tip to get more out of your table saw, router table and more.
Sign up at WoodsmithShop.com.
Everything in today's show comes from the newly expanded Woodsmith Guild edition with shop projects, plans, tips and techniques.
To get a free preview issue of the Woodsmith Guild edition and a free Woodsmith book, go to WoodsmithShop.com.
In addition, past seasons of "The Woodsmith Shop" are available on DVD, or you can watch them online from your computer, tablet or mobile device.
For more information, go to WoodsmithShop.com.
Announcer: Major funding for "The Woodsmith Shop" has been provided by... Old Masters -- offering wood stains and finishes for the woodworking enthusiast and professional.
And by... Kreg -- From the first cut to the final assembly, providing woodworkers with products that help to simplify woodworking challenges.
Kreg.
Additional funding provided by... Titebond Wood Glues -- the pro's advantage.
And by... ♪♪ ♪♪


- Home and How To

Hit the road in a classic car for a tour through Great Britain with two antiques experts.


Support for PBS provided by:
Woodsmith Shop is a local public television program presented by Iowa PBS